The northern lights can be quite difficult to spot, and the most valuable tool in finding them is to know where they are and how strong they are in your area. In particular, you need to track the KP Index as the higher the index number the stronger the magnetic field, and therefore the more likely you’ll be able to see them above you. These two apps (hello aurora and Aurora) were my favourites to use in tracking the lights, in particular the feature in hello aurora that notified you when someone uploaded a sighting in your area. You can also set the apps to a loud notification that will wake you up when the lights are visible above you, so that you don’t have to stay awake all night.
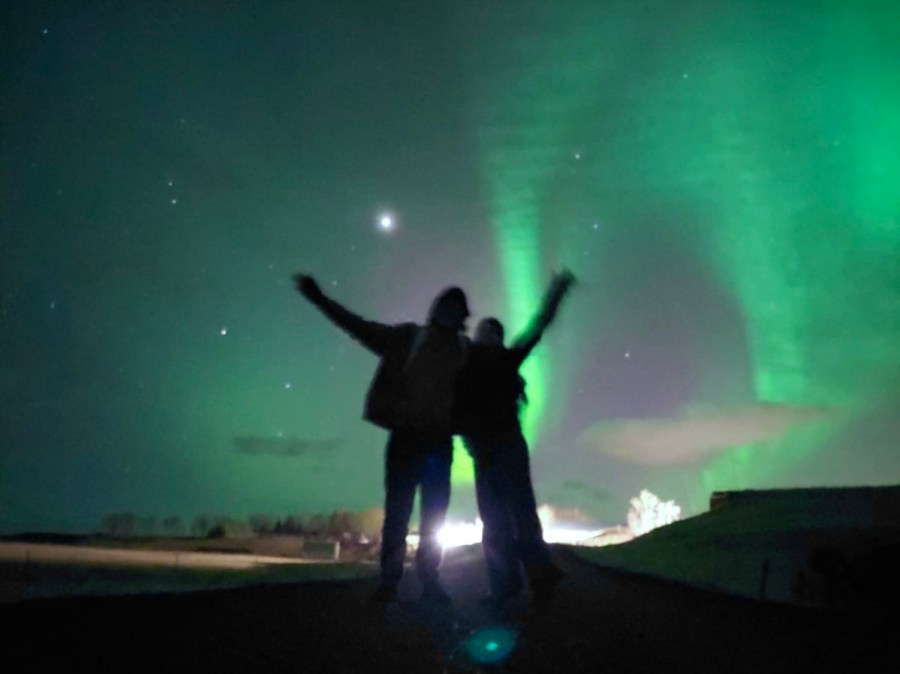
The first thing many people learn once they’ve seen the northern lights is that many (if not most) of the photos you’ve seen online are edited. It is true that your phone/ camera will pick up the colours much more vibrantly than the naked eye can. But don’t let this deter you, it is still a wonderful and mind-blowing experience to see the lights in person, and you can be excited by the fact that no matter how dim you think the lights are, your photos can still turn out great! What you want to do is put your camera on a long exposure and get a steady place for your phone to rest (ideally a tripod). Luckily for us, iPhones are so advanced these days that I didn’t actually change my settings when taking phones, the night camera was good enough.
